
Welcome to our rope basket tutorial! Learn how to create beautiful, functional baskets using simple materials like cotton rope, hot glue guns, and embroidery thread. Perfect for home decor, storage, or gifts, these baskets are easy to customize and add a touch of boho charm to any space. Follow our step-by-step guide to unleash your creativity and make your own unique rope basket today!
Overview of Rope Basket Crafting
Rope basket crafting is a popular DIY activity that transforms simple materials like cotton rope, jute, or macrame into functional and stylish baskets. This craft involves coiling and securing the rope with glue or thread, creating a durable and aesthetically pleasing design. Perfect for home organization, storage, or as a gift, rope baskets offer endless customization options. Whether you’re a beginner or an experienced crafter, this versatile project allows you to create unique pieces that add a bohemian touch to any space while serving practical purposes.
Benefits of Making Your Own Rope Basket
Creating your own rope basket offers numerous benefits, including customization to suit your style and needs. It’s an eco-friendly and cost-effective way to reuse materials like cotton rope or jute. This DIY project allows for personal creativity, enabling you to choose colors, patterns, and sizes. Additionally, it’s a great way to organize your space while adding a bohemian or rustic touch to your home decor. The process is therapeutic and rewarding, providing a sense of accomplishment and a unique, handmade product.
Materials Needed for Rope Basket Making
Key materials include cotton rope, hot glue gun, scissors, sewing machine, felt balls, embroidery thread, and a pillowcase for shaping. Essential tools and optional decorative items enhance your project.
Types of Rope (Cotton, Jute, Macrame)
Cotton rope is soft, versatile, and ideal for colorful, bohemian-style baskets. Jute rope offers a natural, eco-friendly option with a sturdy texture. Macrame rope, often used for intricate designs, provides durability and a sleek appearance. Each type suits different aesthetics and project requirements, allowing crafters to choose based on desired texture, strength, and visual appeal. These ropes are perfect for coiling, wrapping, or sewing, making them essential for creating unique and functional baskets.
Essential Tools (Hot Glue Gun, Scissors, Sewing Machine)
A hot glue gun is indispensable for securing rope coils and ensuring durability. Sharp scissors are needed for precise cuts, while a sewing machine adds strength to stitched designs. These tools are fundamental for crafting sturdy, professional-looking baskets. Optional additions like felt balls or embroidery thread can enhance aesthetics, but the core tools remain essential for any rope basket project. They simplify the process, allowing crafters to achieve polished results efficiently.
Optional Decorative Items (Felt Balls, Embroidery Thread)
Add a personal touch to your rope basket with optional decorative items like felt balls or embroidery thread. Felt balls can be attached to the basket’s edges or base for a colorful, textured look. Embroidery thread allows you to stitch patterns or designs onto the rope coils, adding visual interest. These embellishments let you customize the basket to match your home decor or create a personalized gift. While optional, they elevate the basket’s aesthetic appeal and make it truly unique.
Step-by-Step Guide to Making a Rope Basket
Transform simple materials like rope and glue into a stunning, functional basket. Follow our easy, step-by-step guide to create a beautiful, customizable rope basket perfect for storage or decor.
Preparing the Workspace and Materials
Begin by clearing a flat, stable workspace and gathering all necessary materials, such as cotton rope, hot glue gun, scissors, and a metal pail or mold. Cover the mold with parchment or freezer paper to prevent sticking. Ensure the workspace is clean and free from distractions. Measure and cut the rope into manageable lengths, depending on the size of your basket. Keep decorative items like felt balls or embroidery thread within reach for finishing touches. Proper preparation ensures a smooth and enjoyable crafting process.
Coiling and Shaping the Rope
Start by coiling the rope into a circular or oval shape, forming the base of your basket. Wrap the rope tightly around itself, securing each loop with a dab of hot glue or a stitch. Continue building upward, adjusting the shape as needed to maintain evenness. For larger baskets, use a metal pail or mold as a guide. Ensure the coils align neatly, keeping the tension consistent. This foundational step sets the structure and appearance of your final basket, so patience and precision are key. Achieve a sturdy, balanced base for your design to flourish.
Securing the Coils with Glue or Thread
Once your coils are in place, secure them using hot glue or embroidery thread. Apply small dabs of glue between each coil to hold them firmly together, ensuring stability. For a more discreet method, wrap embroidery thread around the coils, stitching through the rope layers. This step is crucial for durability and prevents the basket from unraveling. Work slowly, applying even pressure, and let the glue cool or the thread tighten before moving on. This ensures a sturdy, long-lasting structure for your rope basket.
Customizing Your Rope Basket
Personalize your rope basket with colorful dyes, embroidery thread patterns, or decorative elements like felt balls. Add a unique touch to match your home decor style perfectly.
Adding Color with Dyes or Paint
Add a vibrant touch to your rope basket with dyes or paint. Use alcohol ink to tint cotton rope for a modern look or try natural dyes for an earthy feel. Acrylic paint can also be applied directly, offering bold, long-lasting colors. For subtle hues, soak the rope in dye before coiling. Experiment with ombre effects or multi-tone patterns for a unique design. Always test colors on a small section first to ensure desired results. This step transforms your basket into a personalized, eye-catching piece of home decor or gift item.
Incorporating Patterns and Designs
Elevate your rope basket by incorporating patterns and designs. Use embroidery thread to wrap around the coils in stripes or chevrons for a decorative touch. Experiment with alternating colors or textures by combining different materials, like fabric or thread, for added visual interest. You can also weave in felt balls or beads for a unique look. Try creating geometric patterns or floral motifs for a personalized aesthetic. These design elements enhance both functionality and beauty, making your basket truly one-of-a-kind and reflective of your creative style.
Enhancing Durability with Protective Coatings
Protect your rope basket from wear and tear by applying a clear protective coating. Use a fabric sealant or natural wax to shield the material from spills and humidity. Apply the coating evenly with a brush, ensuring full coverage. Allow it to dry completely before use. For added durability, you can also spray a clear acrylic coating. This step ensures your basket remains sturdy and long-lasting, perfect for holding heavier items or withstanding frequent use. It’s an easy way to extend the life of your handmade creation.

Practical Applications of Rope Baskets
Rope baskets are versatile for home organization, storing small items, and as eco-friendly gift containers. They also add a rustic, bohemian touch to home decor, making them both functional and stylish.
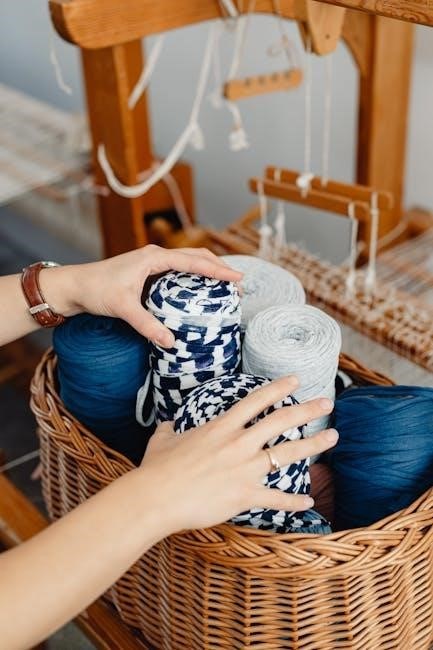
Home Organization and Storage
Rope baskets are excellent for organizing small items like yarn, sewing supplies, or toys. They can store craft tools, keeping workspaces tidy. Use them to hold knitting needles, crochet hooks, or embroidery threads. These baskets are also great for storing linens, bathroom essentials, or office supplies. Their sturdy design makes them ideal for everyday use, while their natural aesthetic adds warmth to any room. Customize sizes and colors to fit your space, ensuring practical storage with a touch of boho charm.
Gift Ideas and Personalized Presents
Rope baskets make thoughtful, personalized gifts for birthdays, holidays, or weddings. Fill them with candles, bath products, or handmade items for a meaningful present. Customize by adding embroidery thread patterns or felt balls to match the recipient’s style. Use them as gift hampers for plants, teas, or artisanal goods. Their rustic charm and eco-friendly appeal make them ideal for those who love boho aesthetics. Personalize further with monograms or themed decorations, turning a simple basket into a unique, heartfelt gift.
Boho and Rustic Home Decor
Rope baskets are perfect for adding a bohemian or rustic touch to your home decor. Their natural fibers and earthy tones bring warmth and coziness to any room. Use them as wall hangings, shelf organizers, or standalone decorative pieces. Add embroidery thread patterns or felt balls for a personalized boho vibe. Pair with potted plants, woven textiles, or vintage items to enhance the rustic charm. These baskets blend functionality with style, creating a unique and inviting space that reflects your personal aesthetic.
Tips and Tricks for Perfect Rope Baskets
Master the basics of coiling and securing ropes for a sturdy base. Use hot glue for strong bonds and maintain consistent tension while shaping. Experiment with materials and sizes to achieve desired textures and styles. For a polished look, add decorative elements like embroidery thread or felt balls. These tips will help you craft functional yet stylish baskets tailored to your creative vision!
Choosing the Right Rope for the Project
Selecting the ideal rope is crucial for your basket’s durability and aesthetic. Cotton rope is soft and versatile, perfect for delicate designs. Jute rope offers a natural, earthy look, great for rustic themes. Macrame rope, with its sleek texture, is ideal for intricate patterns. Consider thickness and flexibility based on your desired basket size and use. Proper rope choice ensures stability and enhances the overall appearance. Match your project’s needs with the right rope type for professional results.
Maintaining Consistency in Coiling
Maintaining consistent coiling is key to a professional-looking rope basket. Start by applying steady tension while wrapping the rope to avoid loose or uneven coils. Use a ruler or fabric strip as a guide to ensure uniform width. Measure each coil to match the previous one, adjusting as needed. Keep the workspace clean to avoid tangles. Regularly check the alignment to prevent the basket from leaning. By focusing on even spacing and tightness, you’ll achieve a balanced and visually appealing design.
Troubleshooting Common Issues
Common issues in rope basket making include uneven coils, loose strands, or excess glue. To fix uneven coils, gently reshape while the glue is still soft. For loose strands, apply a small dab of hot glue to secure them. If the basket becomes misshapen, let it cool, then reshape and re-glue. To avoid excess glue, apply it sparingly and wipe away drips immediately. Regularly inspecting your work and making adjustments as you go ensures a polished finish and prevents major corrections later.
Advanced Techniques for Experienced Crafters
Elevate your rope basket crafting with advanced techniques like creating slit handles, combining rope with fabric, and experimenting with unique shapes and sizes for a personalized touch.
Creating Slit Handles for Storage Baskets
Enhance functionality and style by adding slit handles to your rope baskets. Cut two vertical slits on opposite sides near the top edge of the basket. Weave the rope through the slits, securing it with hot glue for durability. This technique adds a rustic touch and makes the basket easier to carry. Use scissors to trim excess rope and ensure smooth edges. Perfect for storage or as a decorative element, slit handles offer both practicality and visual appeal to your handmade creations.
Combining Rope with Fabric or Thread
Elevate your rope basket by incorporating fabric or thread for added texture and color. Wrap fabric strips around the rope before coiling or sew fabric into the design for a unique look. Use embroidery thread to weave patterns between the ropes, creating intricate details. This technique allows for endless customization, blending the natural essence of rope with the softness of fabric. Experiment with different materials and stitches to create a one-of-a-kind piece that combines functionality with artistic flair. Perfect for adding a personal touch to your handmade basket;
Experimenting with Different Shapes and Sizes
Take your rope basket crafting to the next level by experimenting with unique shapes and sizes. Use molds or forms to create round, oval, or even square baskets. For smaller projects, try mini baskets for jewelry or keys, while larger ones can serve as storage solutions. Adjust the coiling technique to achieve varying heights and widths. This versatility allows you to tailor your creations to specific needs, making each piece truly unique. Whether it’s a petite decorative item or a spacious storage basket, the possibilities are endless with rope crafting.