
Welcome to the Euro Pro Sewing Machine Manual, your guide to mastering this versatile sewing machine. Designed for ease of use, it offers durability and precision stitching.
1.1 Overview of the Euro Pro Sewing Machine
The Euro Pro Sewing Machine is a versatile and user-friendly appliance designed for both beginners and experienced sewists. It offers a range of features to enhance your sewing experience, including precision stitching, durability, and ease of use. This manual serves as your comprehensive guide to understanding and operating the machine effectively. By following the instructions, you can unlock its full potential and achieve professional-quality results for various sewing projects.
1.2 Key Features and Benefits
The Euro Pro Sewing Machine boasts an array of features designed to enhance your sewing experience. With its built-in stitches, automatic threading system, and adjustable tension control, it offers versatility for various fabrics and projects. The machine is lightweight yet durable, making it easy to handle and transport. Its user-friendly interface ensures a smooth learning curve for beginners. Additionally, the included accessories, such as multiple presser feet, expand your creative possibilities. These features collectively provide a seamless and efficient sewing process, catering to both hobbyists and professionals.
Safety Precautions and Setup
Welcome to the Euro Pro Sewing Machine Manual! Ensure safety by avoiding sharp objects, keeping children away, and maintaining a clean workspace. Always follow setup guidelines for safe operation.
2.1 Unpacking and Initial Inspection
When unpacking your Euro Pro Sewing Machine, carefully inspect for any damage or missing components. Ensure all parts, including the sewing machine, accessories, and manual, are included. Verify the machine’s exterior and internal mechanisms are free from damage. Before use, thoroughly read the manual to understand safety guidelines and proper setup. Familiarize yourself with the machine’s features and ensure all parts are securely attached. This initial inspection ensures a safe and effective sewing experience, helping you avoid potential issues during operation.
2.2 Safety Guidelines for Operation
To ensure safe operation of your Euro Pro Sewing Machine, always follow these guidelines. Use the machine only for its intended purpose and keep children away during operation. Avoid wearing loose clothing or jewelry that could get caught in moving parts. Keep fingers away from the needle and presser foot, and never touch sharp components like the needle or rotary cutter. Ensure the workspace is well-lit and free from clutter. Consult the manual for specific safety precautions and discontinue use if any malfunction occurs. Always unplug the machine during cleaning or maintenance.
2.3 Proper Workspace Setup
Setting up a proper workspace is essential for efficient and safe sewing. Place the machine on a stable, flat surface, ensuring it is level and secure. Ensure good lighting to reduce eye strain and improve visibility. Keep the area clean and free from clutter to prevent accidents. Store sewing supplies, like threads and needles, in an organized manner within easy reach. Avoid placing the machine near flammable materials or water sources. Maintain a comfortable posture by positioning the machine at a height that allows you to sew without straining your back or neck.
Parts and Accessories Identification
Familiarize yourself with the Euro Pro Sewing Machine’s components, including the sewing head, bobbin, spool pins, and control panel. Accessories like presser feet and needles are essential for various stitches.
3.1 Main Components of the Machine
The Euro Pro Sewing Machine features a durable sewing head, a user-friendly control panel, and a bobbin compartment. The machine includes a spool pin for thread, a handwheel for manual operation, and a power switch for easy startup. Additional components like presser feet and stitch selectors ensure versatility. Understanding these parts is essential for efficient operation and troubleshooting. Familiarize yourself with each element to maximize your sewing experience and maintain the machine properly.
3.2 Understanding the Control Panel
The control panel is the central hub for operating the Euro Pro Sewing Machine. It features stitch selection buttons, a tension dial, and an LCD display for monitoring settings. The panel allows you to choose from various stitch types, adjust stitch length and width, and customize sewing speeds. Intuitive controls ensure easy navigation, making it simple to tailor settings for different fabrics and projects.
Familiarizing yourself with the control panel’s functions will enhance your sewing experience, enabling precise adjustments and efficient operation. Always refer to the panel for real-time feedback during your sewing tasks.
3.4 Essential Accessories Included
The Euro Pro Sewing Machine comes with a range of essential accessories to enhance your sewing experience. These include multiple bobbins for continuous sewing, a set of presser feet for specialized tasks, and a variety of needles suited for different fabrics. Additionally, a dust cover is provided to protect the machine when not in use. Other accessories may include a seam ripper, measuring tape, and screwdriver for maintenance. These tools ensure you have everything needed to start sewing and maintain your machine effectively.
Threading and Bobbin Setup
Master the basics of threading your Euro Pro Sewing Machine and correctly installing the bobbin for smooth operation. Ensure proper thread flow and tension for consistent stitching.
4.1 Step-by-Step Threading Guide
Begin by placing the thread on the spool pin. Gently pull the thread through the tension discs, ensuring it rests in the guide. Move the thread down toward the needle, looping it around the take-up lever. Pass it through the needle’s eye from front to back. Avoid pulling too tightly, as this may cause kinking. Once threaded, wind excess thread around the bobbin. Trim neatly and test the tension by gently tugging. Proper threading ensures smooth stitching and prevents machine jams. Always keep the machine well-lit for accuracy. If unsure, consult the manual for detailed visuals.
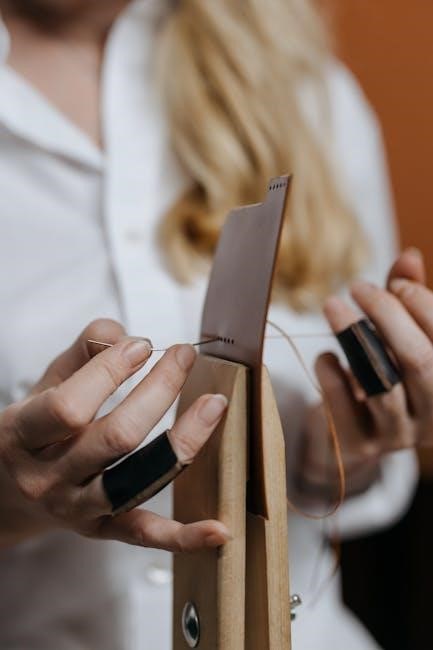
4.2 Installing the Bobbin Correctly
Lift the presser foot to release tension. Remove any loose thread from the machine. Place the bobbin into the bobbin case, ensuring it sits snugly and aligns with the case’s notch. Pull the thread through the bobbin case’s slot, leaving a small loop. Gently tug the thread to secure the bobbin in place. Avoid overfilling the bobbin, as this can cause uneven stitching. Once installed, lower the presser foot and test the setup by sewing a few stitches. Proper bobbin installation is crucial for consistent stitching and machine performance. Always refer to the manual for specific alignment guidance.
4;3 Common Threading Mistakes to Avoid
One of the most frequent errors is pulling the thread too tightly, which can cause breakage or uneven tension. Another mistake is not leaving enough thread slack, leading to improper stitch formation. Additionally, some users forget to seat the thread correctly in the take-up lever, disrupting the machine’s tension system. Lastly, neglecting to cut the thread tail before sewing can result in tangles or jams. Avoid these mistakes by following the manual’s threading guide carefully and double-checking each step for accuracy.
Basic Sewing Operations
Master the fundamentals of sewing with your Euro Pro machine by learning to power on, select stitches, align fabric, and control speed using the foot pedal.
5.1 Selecting the Right Stitch Type
Selecting the correct stitch type is essential for achieving professional results. The Euro Pro sewing machine offers various stitches, including straight, zigzag, and decorative options. Choose straight stitches for standard sewing and repairs, while zigzag stitches are ideal for elastic fabrics and preventing fraying. Decorative stitches add embellishments to projects. Always match the stitch type to your fabric and desired outcome for optimal results. Refer to the control panel or manual to explore stitch options and customize your sewing experience effectively.
5.2 Adjusting Tension for Perfect Stitches
Proper tension adjustment ensures even stitching and prevents fabric puckering. Locate the tension dials on your Euro Pro machine, usually found on the front or top. Turn the dials clockwise to tighten or counterclockwise to loosen the thread. Test the tension by sewing a straight line on scrap fabric. Adjust until stitches are balanced, with no visible loops on the underside. Avoid over-tightening, as it may damage the machine or fabric. For consistent results, maintain even tension across all stitch types and fabrics.
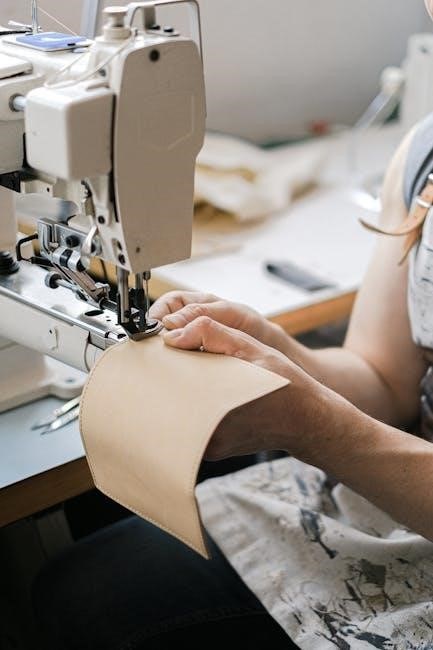
5.3 Starting and Stopping Your Sewing
To begin sewing, ensure the machine is plugged in and turned on using the power switch. Place the fabric under the needle, aligning it with your desired seam. Gently press the foot pedal or use the start/stop button to initiate sewing. For precise control, start with a slow, steady pace. To stop, release the foot pedal or press the stop button. Always complete a reverse stitch to secure your work. Keep hands clear of the needle area during operation to ensure safety and maintain even fabric flow.
Troubleshooting Common Issues
This section helps you identify and resolve common issues with your Euro Pro sewing machine, ensuring smooth operation and optimal performance. Address problems effectively with practical solutions.
6.1 Machine Not Turning On
If your Euro Pro sewing machine won’t turn on, first ensure it’s properly plugged into a working power outlet. Check for blown fuses or tripped circuit breakers. Verify the power switch is functioning correctly. Inspect the power cord for damage or loose connections. Ensure the machine is set to the correct voltage for your region. If issues persist, consult the user manual or contact Euro Pro customer support for assistance. Always prioritize safety when troubleshooting electrical devices.
6.2 Thread Breakage and Tangles
Thread breakage and tangles can occur due to incorrect threading, uneven tension, or using low-quality thread. Ensure the thread is properly seated in the spool pin and bobbin. Check for knots or twists in the thread before sewing. Adjust the tension dials to the recommended settings for your fabric type. Avoid pulling the fabric too tightly, as this can cause thread to break. Regularly trim loose thread ends and clean the machine to prevent tangles. If issues persist, consult the manual for specific adjustments or contact support for further assistance.
6.3 Uneven or Skipping Stitches
Uneven or skipping stitches can occur due to incorrect tension settings, a dull or incorrect needle, or improper threading. Ensure the machine is threaded correctly and the bobbin is properly seated. Check the needle for damage or wear and replace it if necessary. Adjust the upper and lower tension dials to the recommended settings for your fabric type. Keep the fabric moving smoothly without pulling or dragging. If stitches remain uneven, consult the manual for specific adjustments or consider consulting a professional for further assistance to resolve the issue effectively.
Maintenance and Cleaning
Regularly clean the Euro Pro sewing machine by removing dust and lint with a soft brush; Lubricate moving parts as recommended. Store in a cool, dry place when not in use for longevity. Always follow the manufacturer’s guidelines for maintenance to ensure optimal performance. Proper care extends the machine’s lifespan and prevents mechanical issues. Schedule routine cleaning and lubrication to keep your Euro Pro sewing machine functioning smoothly and efficiently over time. Ensure all parts are free from debris and well-maintained for consistent stitching and durability.
7.1 Regular Cleaning Routine
For a regular cleaning routine, start by turning off and unplugging the Euro Pro sewing machine. Use a soft, dry brush or compressed air to remove lint and debris from the bobbin area, tension discs, and stitch plate. Gently wipe the needle and surrounding areas with a clean cloth. Regularly cleaning prevents dust and thread residue from building up, ensuring smooth operation. Pay special attention to the bobbin case and hook race, as these areas tend to accumulate the most lint. Clean after each project to maintain performance and extend the machine’s lifespan.
7.2 Lubricating Moving Parts
To ensure smooth operation, regularly lubricate the Euro Pro sewing machine’s moving parts. Use the sewing machine oil provided or a high-quality alternative. Apply a few drops to the hook race and shuttle mechanism, avoiding the needle bar. Gently turn the handwheel to distribute the oil evenly. Do not over-lubricate, as excess oil can attract dust. Lubricate after cleaning or every 50 hours of use. Proper lubrication reduces friction, prevents wear, and maintains consistent stitch quality. Always refer to the manual for specific lubrication points to avoid damaging internal components.
7.3 Storage Tips for Longevity
Proper storage is essential for maintaining your Euro Pro sewing machine’s performance and longevity. After cleaning, store the machine in a dry, cool place away from direct sunlight and moisture. Use the original hardcover case or a soft, breathable cloth to protect it from dust. Avoid storing it in basements or attics prone to humidity. Ensure the machine is unplugged and the needle is removed to prevent rust. Store accessories separately in a labeled container to avoid misplacement. Regular storage maintenance ensures your machine remains in optimal condition for future use.
Advanced Features and Customization
Explore advanced stitching options, including customizable stitch length, width, and tension settings, to tailor your sewing projects for various fabrics and designs with precision and ease.
8.1 Using the Built-In Stitches Effectively
The Euro Pro Sewing Machine offers a variety of built-in stitches, including straight, zigzag, and decorative options. To use them effectively, start by selecting the stitch type that matches your fabric and project needs. For example, use a straight stitch for lightweight fabrics and a zigzag stitch for stretching or reinforcing seams. Experiment with the stitch length and width settings to achieve the desired appearance. Refer to the stitch chart on the machine or in the manual for guidance. Practice on scrap fabric to ensure optimal results before sewing your final project.
8.2 Adjusting Stitch Length and Width
To customize your sewing experience, the Euro Pro Sewing Machine allows easy adjustment of stitch length and width. Use the control panel buttons to increase or decrease these settings. A shorter stitch length is ideal for delicate fabrics, while a longer length suits thicker materials. Similarly, narrow stitch widths are best for lightweight fabrics, while wider widths work well for heavy-duty projects. Adjustments can be made using the buttons or dial, ensuring precise control for professional-looking results. Always test settings on scrap fabric before sewing your final piece.
8.3 Customizing Tension for Special Fabrics
Customizing tension on the Euro Pro Sewing Machine ensures optimal results for various fabrics. For delicate fabrics like silk, reduce the upper thread tension to prevent puckering. For heavy-duty fabrics like denim or canvas, increase the tension slightly for secure stitches. Use the tension dial or control panel to make precise adjustments. Always test the tension on a scrap piece of fabric before sewing your final project. Proper tension ensures even stitching and prevents issues like loose threads or fabric dragging.
Resources and Support
Access comprehensive support through Euro Pro’s customer service, online FAQs, and authorized dealers. Visit their website for replacement parts, troubleshooting guides, and user manuals.
9.1 Contacting Euro Pro Customer Service
To contact Euro Pro customer service, call their toll-free number or email their support team. Visit their official website for contact details, operating hours, and support options. Live chat is also available for quick inquiries; Ensure you have your machine’s model number and a detailed description of your issue ready for faster assistance. Representatives are available Monday through Friday, 9 AM to 5 PM EST. For urgent matters, consider calling directly. Always verify contact information through official Euro Pro channels to avoid unauthorized support.
9.2 Finding Replacement Parts
To find replacement parts for your Euro Pro sewing machine, visit the official Euro Pro website or authorized dealers. Use the machine’s model number to ensure compatibility. Genuine parts are available through their online store or retail partners. For convenience, check online marketplaces like Amazon or eBay, but verify seller authenticity. Contact customer service for assistance in locating specific parts. Avoid unauthorized sellers to maintain quality and warranty validity. Always cross-reference part numbers with your manual or the Euro Pro website for accuracy.
9.4 Online Communities for Euro Pro Users
Join online communities like Facebook groups, Reddit forums, or specialized sewing platforms to connect with other Euro Pro users. These communities offer valuable tips, troubleshooting advice, and project ideas. Share your experiences and learn from others to enhance your sewing skills. Many groups are dedicated to specific machine models, providing targeted support. Participate in discussions to resolve common issues or discover creative techniques. Remember to follow community guidelines and contribute positively to foster a helpful environment for all members.
Project Ideas for Beginners
Start with simple projects like pillowcases, tote bags, or napkins to practice basic stitching and fabric handling. These small tasks build confidence and sewing skills effectively.
10.1 Simple Projects to Get Started
Beginners can start with easy projects like pillowcases, tote bags, or simple hem repairs. These tasks help familiarize you with the machine’s basic functions and fabric handling. Try making a zipper pouch or a coin purse to practice working with small seams and zippers. These projects are quick, rewarding, and teach essential skills like straight stitching and fabric preparation. They also allow you to build confidence before tackling more complex designs. Start small to master the fundamentals and enjoy the creative process with your Euro Pro sewing machine.
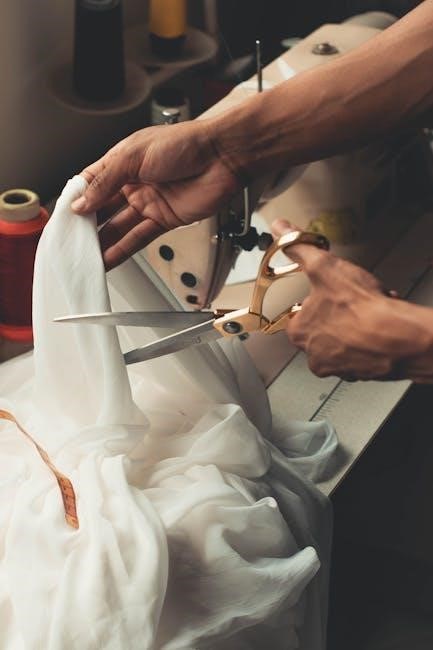
10.2 Tips for Sewing Different Fabrics
When sewing with various fabrics, adjust your machine settings accordingly. For delicate fabrics like silk or chiffon, use a sharp needle and reduce tension. Heavier fabrics such as denim or canvas may require a heavier-duty needle and increased stitch length. Always test stitches on scrap fabric to ensure proper settings. Use the appropriate presser foot for the fabric type, and consider using a walking foot for thick or layered materials. This ensures smooth operation and professional results. Adjusting for fabric type prevents issues like puckering or uneven stitching.
10.3 Enhancing Your Skills with Practice
Consistent practice is key to mastering your Euro Pro Sewing Machine. Start with simple projects like straight lines and gradually progress to curves and corners. Experiment with different stitches and settings on scrap fabric before working on actual projects; Pay attention to tension and fabric movement to achieve consistent results. Don’t be discouraged by early mistakes—review your work and adjust techniques. As confidence grows, explore advanced features like decorative stitches and custom settings to expand your sewing capabilities.